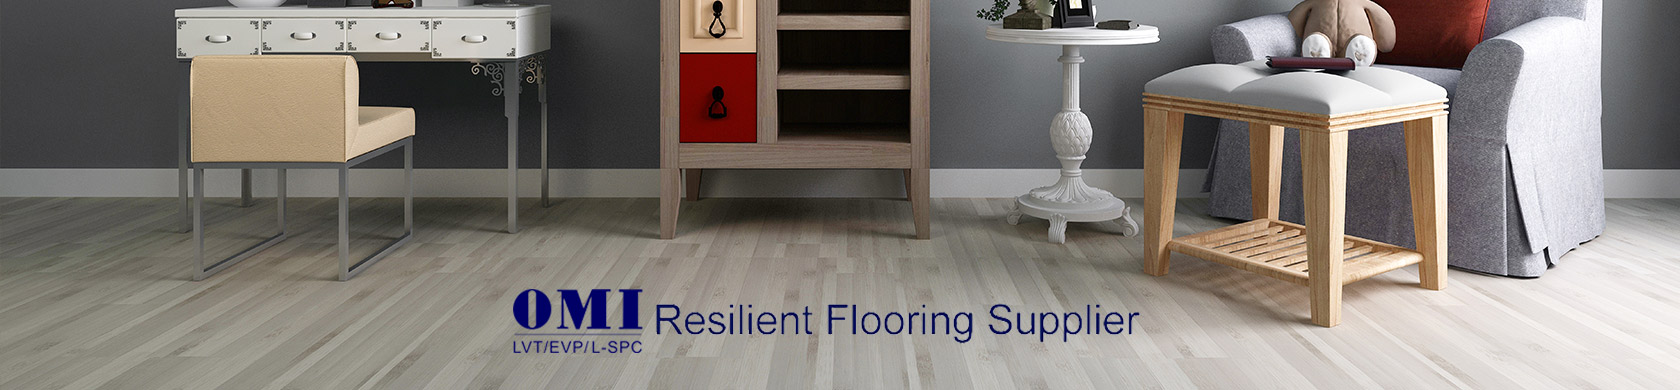
OMI DRY BACK RESILIENT VINYL
PLANK INSTALLATION GUIDELINES
Knowing OMI Luxury Vinyl Planks:
• OMI is intended for interior installations only, suitable for below- grade, on –grade and above-grade installations. OMI should not be installed where the applications substrate is exposed to weather elements.
• OMI and your chosen adhesive must be acclimated for a minimum of 48 hrs., a consistent room temp. of 65-70 degrees, with a relative humidity of 35-55% should be maintained before, during and after all installations.
• Direct exposure to sunlight may cause fading, and or joint separation. OMI is not recommended for installation in sunrooms.
• OMI is water resistant, however, constant/prolonged exposure to excessive moisture/humidity may affect the product. Moisture/humidity issues must be addressed and corrected prior to commencing installation.
• OMI does not warranty unsatisfactory installations due to excessive moisture, alkali or hydrostatic pressure in substrates.
Installation instance show
There are two types of dry back joints used in our floors - the dry back with adhensive and the dry back without adhensive. Rather than try and explain them.
(1)The Installation instance show of dry back with adhensive
Step 1
We make dry backs to resemble wood floors. Dry backs are less expensive than wood and easier to a new vinyl tile floor is an inexpensive way to upgrade any room’s appearance.


Step 2
Lay out the dry back in the room and mark the area where the excess will be cut out. Cut with a utility knife or heavy-duty shears.

Step 3
Once you have determined that your concrete floor is not damp, you can successfully install self-adhesive vinyl tile after removing carpet.

(2)The Installation instance show of dry back without adhensive
Step 1
Starting at an intersection of lines, spread adhesive with the smooth edge of a notched trowel. Lay the adhesive right up to -- but not over – the layout lines. Then comb the adhesive with the notched edge of the trowel. Let the adhesive become tacky.

Step 2
Line up the first tile with the intersection of the layout lines and set it on the adhesive. Then set the second tile against the first one and lower it in place. Don’t slide the tiles; you’ll push mastic up between the joints. Check the grain direction and set the rest of the quadrant.

Step 3
To mark the edge tiles for cutting, set a loose tile exactly on top of the last tile in a row. Then set a marker tile on top of that one, positioning it against 1/4-inch spacers at the wall. (Resilient tile won't expand much, but the subfloor will.) Run a pencil along the edge of the marker tile to mark the cutting line.

Cutting Vinyl Tile: Step 1
Brittle resilient tiles cut more easily if you warm the cutting line slightly with a hair dryer. Use a carpenter's pencil to mark the line and a utility knife to make the cut.

Cutting Vinyl Tile: Step 2
Score the surface of the tile with the knife, then make repeated passes until you have cut through the tile. If the cut edge will not be visible, snap the tile after a few passes with the knife instead.

Step 3
At outside corners, position a loose tile and a marker tile as if you were cutting an edge tile. Mark the loose tile as you did in Step 3 and reposition the loose tile and marker tile to the other corner. Mark the loose tile for the corner cutout.

Step 4
When you have set one quadrant, clean off excess or spilled adhesive with the solvent recommended by the manufacturer (usually detergent and water). Don't wet the floor; excess liquid weakens the adhesive. Set the remaining quadrants. Roll the floor when finished.

PRE-INSTALLATION PROCEDURES
Job Site Evaluation
1.Examine the driveway and landscaping surrounding the building. Be sure that they slope away and direct water away from the foundation.
2.All gutters and downspouts should be in place, directing water away from the building.
3.The building should be closed in with all outside doors and windows in place.
4. All concrete, masonry, framing members, drywall, paint and other "wet" work should be thoroughly dry.
5.The wall coverings should be in place and the painting completed except for the final coat on the base molding. (When possible, delay installation of base molding until flooring installation is complete.)
6.Basements and crawl spaces must be dry and well ventilated. (Crawl space must be a minimum of 24" (600 mm) from the ground to underside of joists. A ground cover of 6-8 mil black polyethylene film is essential as a vapor barrier with joints lapped six inches and taped. The crawl space should have perimeter venting to a minimum of 1.5% of the crawl space square footage. These vents should be properly located to foster cross ventilation).
7.Permanent air conditioning and heating systems should be in place and operational
8.The installation site should have a consistent room temperature of 60-70 degrees F and humidity of 35-55% for 14 days prior, during and after installation for a for proper living environment.
9.HVAC Systems should be in place and working 10 days before installation
10.Substrates must be checked for moisture and akali content using the appropriate testing methods.
SUITABLE SURFACES
Concrete: Concrete substrates cured a minimum of 90 days, must be clean, dry and structurally sound, with a minimal compression strength of 3,500 psi. Smooth and flat within 1/8” in 6 ft or 3/16” in 10 ft. Free of all surface contaminates, such as dust, paint, grease, oils and solvents. All existing adhesive residue must be mechanically removed, do not use any chemical removal methods. Be cautious of sealed slabs, use a simple water test to test for the slabs porosity. All slabs should be checked for moisture and alkalinity. Calcium Chloride test results must never exceed 5lbs per 1000 s/f per 24 hr period (MVER). Alkalinity should be between 7-9.
Lightweight Concrete: A minimal density should be greater than 90 lbs per cubic ft.
A minimal compressive strength of 2,500 psi or greater. Gypsum based substrates are not recommended.
Wood Substrates: Plywood, standard double-layer construction of 1” minimum.
Rigid with zero vertical deflection. APA Underlayment Grade, smooth and flat within 1/8” in 6 ft or 3/16” in 10 ft span. Free of all surface contaminates, such as dust, paint, grease, oils and solvents.
Any surface irregularities which may transfer thru to the finished surface, must be addressed mechanically or by adding a Portland based leveling compound, per that manufacturers specifications.
Radiant Heat: Accenture Resilient Vinyl may be installed over radiant heated floors (Surface temperature must never exceed or sustain 85ºF). System must be operative for minimum of 2 weeks to remove substrate moisture. Turn off heat, 3 days prior to installation and min. of 5 days after installation. Slowly over 24 hr time frame return to normal operating temp. Surface temperature must never exceed or sustain 85ºF. Consult radiant heat manufacturers recommendations.
UNSUITABLE SURFACES
Unsuitable surfaces include, but are not limited to : Damp or wet concrete, rough surfaces, any cushioned underlayment, particleboard, OSB,
Hardboard, treated plywood, strip wood floors, chip boards, wafer boards,
Masonite, un-smooth plywood, non-underlayment grade plywood, cementious backer boards, VCT, asphalt tile, rubber tile. Rough, heavy textured and/or uneven surfaces may telegraph through the vinyl and distort the finished surface. This product is not suitable in rooms that could potentially flood or rooms that have damp concrete or saunas. Do not install this product in areas which are exposed to long term direct sunlight and or extreme temperature changes.
OMI Resilient Vinyl may be installed on all grade levels including basements. Although OMI is water resistant, moisture issues must be identified and corrected prior to any installation.
“INSTALLATION IMPLIES ACCEPTANCE”
Any appearance or performance related issues that are associated with underlayments and or substrates are the responsibility of the home owner, installer, underlayment manufacturer.
WARNING: DO NOT REMOVE OLD RESILIENT VINYL FLOORING.THESE PRODUCTS MAY CONTAIN EITHER ASBESTOS FIBERS OR CRYTALLINE SILICA, WHICH CAN BE HARMFUL TO YOUR HEALTH. Consult the Resilient Floor Covering Instute.
PREPARATION
The vinyl planks and your chosen adhesive should be allowed to acclimatize at room temperature approx 65-70ºF for 48 hours prior to installation (Excessive cold or heat can affect the size of individual planks). Must be stored horizontally, flat, no more than 6 cartons high, off the floor to allow for air circulation. Carefully check planks for any defects before installation. Check that all BATCH NUMBERS and ITEM NUMBERS are the same and that you have purchased sufficient material to complete the job. Remove any traces of glue or residue from the previous flooring.
See Acceptable Substrates and minimal requirements.
GETTING STARTED:
Determine the direction that the flooring will be installed. Installation parallel to the longest wall is recommended for best visual effects. Undercut all door jambs by turning a plank upside down and using a handsaw to cut away the necessary height so that planks slide easily under the frames. Remove any existing base, quarter round, shoe molding and door thresholds. Sweep or vac to remove any debris. Floor should be installed from several cartons at the same time to insure a good color and shade mixture.
Note: Always select a premium quality adhesive. OMI may be installed
by using the wet lay or pressure sensitive methods. Consult your chosen adhesive manufacturers instructions/guidelines for acceptable conditions, substrates, and applications.
INSTALLATION FOR VINYL PLANKS:
Room Layout
A) Find the center point of the room, mark it. Strike a line.
B) Obtain a true 90 degree angle using a Carpenters Square.
C) Measure and strike a 2nd line to divide the room into 4 equal sections.
D) Measure the distance from the center line to the wall, parallel to the length of the planks.
E) Divide the measurement by the width of the plank. If less than ½ of a plank remains, adjust the line to compensate. This should allow for a wider border plank and help avoid overly narrow planks upon completion.

Plank Layout
A) Carefully trowel adhesive onto ½ of the area, do not cover your marked lines. After allowing sufficient flash/open time per adhesive manufacturers guidelines. Carefully place the 1st plank at the right angle junction of your marked lines.
B) Continue to install additional planks flush along the line while making sure all butt joints are tight against adoining planks. The 1st row of planks must be perfectly straight along the line. Do not slide planks. Avoid adhesive on the planks edges/end and surface.
C) Continue to install planks into the adhesive using the “row by row” or “pyramid method”. Break end joints a minimum of 8” for a better overall appearance.


Finishing Border
A) Measure the distance from the last plank to the wall.
B) Mark the plank and cut along the mark.
C) Lay the plank into place, making sure the cut edge is against the wall. NOTE: Always butt Factory Edge Against Factory Edge.
D) For irregular shapes, use kraft paper or cardboard to create a template.
Important: All OMI must be rolled in both directions with a 100-lb flooring roller after installation. Use a hand roller, applying sufficient pressure to roll areas that can not be reached with a 100-lb roller.
Complete the remaining installation using the same previous methods.
Immediately clean any adhesive residue from OMI surface.
Carefully follow your chosen adhesive manufacturers recommendations for adhesive cure times before setting furniture and opening the floor to foot
traffic.
Completing the job:
Install baseboards and or quarter round around the perimeter of the installation. Install door transition moldings. Sweep or vac up any remaining debris. Clean as necessary with a quality resilient vinyl floor cleaner.
To prevent surface damage avoid rolling heavy appliances and furniture directly on the floor, use plywood or hardboard if necessary. Apply felt flooring protectors to all furniture legs.
CARE AND MAINTENTANCE
Sweep, dust mop or vac regularly to remove surface grit and dust. Use a damp cloth or mop with a quality resilient vinyl floor cleaner to clean up dirt and footprints, (be careful to avoid using excessive moisture). All spills should be cleaned up immediately.
CAUTION: Planks are slippery when wet.
Do not use a wet spray micro fiber mop. Never use wax, polish, vinegar, abrasive cleaners or scouring agents as they may dull or distort the finish.
High heels can damage floors. Use protective pads under all furniture. Use exterior doormats at all entrance ways to keep dirt and moisture from being tracked in. Avoid use of interior rubber, foam or plastic back mats as they may discolor the floor. To prevent slippage of area rugs use an approved latex rug underlay from a reputable manufacturer. Do not allow pets with unclipped nails to scratch or damage the floor.
Do not use steam cleaners.
Avoid exposure to direct sunlight for prolonged periods of time. Use drapes or blinds to minimize direct sunlight during peak sunlight hours.
It’s a good idea to save a few planks in case of accidental damage. Planks can be replaced or repaired by a qualified professional.
WARRANTY
This guarantee is for replacement or refund of the OMI Resilient Vinyl Plank flooring only, no labor (including the cost of labor for installation of the replacement floor) or costs incurred with loss of time, incidental expenses or any other damage. It doesn’t cover damage from improper installation or maintenance, burns, tears, scratches and or indentations of any kind, stains or reduction in gloss level due to normal use and or exterior applications. Any pieces that appear to have defects should not be installed. OMI will not be responsible for any claim installed with visual defects.
This Limited Warranty is null and void, if prior to installation OMI is not acclimated and if post installation, such acclimation environment is not continuously maintained per written guidelines.
OMI Guidelines/Warranty are revised periodically and floors must be installed according to current guidelines at the time of installation. Please check with your vendor for the current guidelines.
10 Year Residential Warranty
Our 10-Year Residential Limited Warranty for vinyl plank means that for 10 years, from the date of purchase, your floor will be free from manufacturing defects and will not wear through or permanently stain from common household agents when installed and maintained according to instructions supplied with each carton. Improper installation or workmanship should be directed to the contractor who installed the floor.
5 Year Commercial Warranty
Our 5 Year Limited Commercial Warranty for vinyl plank means that for 5 years, from the date of purchase your floor will be free from manufacturing defects and will not wear through or permanently stain from common household agents when installed and maintained according to instructions supplied with each carton. Improper installation or workmanship should be directed to the contractor who installed the floor.
 Deutsch
 Español
 Français
 Italiano
 Português
 日本の
日本の 한국어
한국어 العربية
 hrvatski
 česky
česky Dansk
Dansk Nederlands
 suomi
suomi Ελληνικά
 हिन्दी
 norsk
norsk Türkiye
 ประเทศไทย
 български
 русский
 Svenska
 Polski
 Română
 Việt Nam